
SEARCH WHAT YOU WANT
How to Build a Mirror Shine on Dress Shoes at Home: Layered Wax, Tools and Common Mistakes
Time:2026-10-21
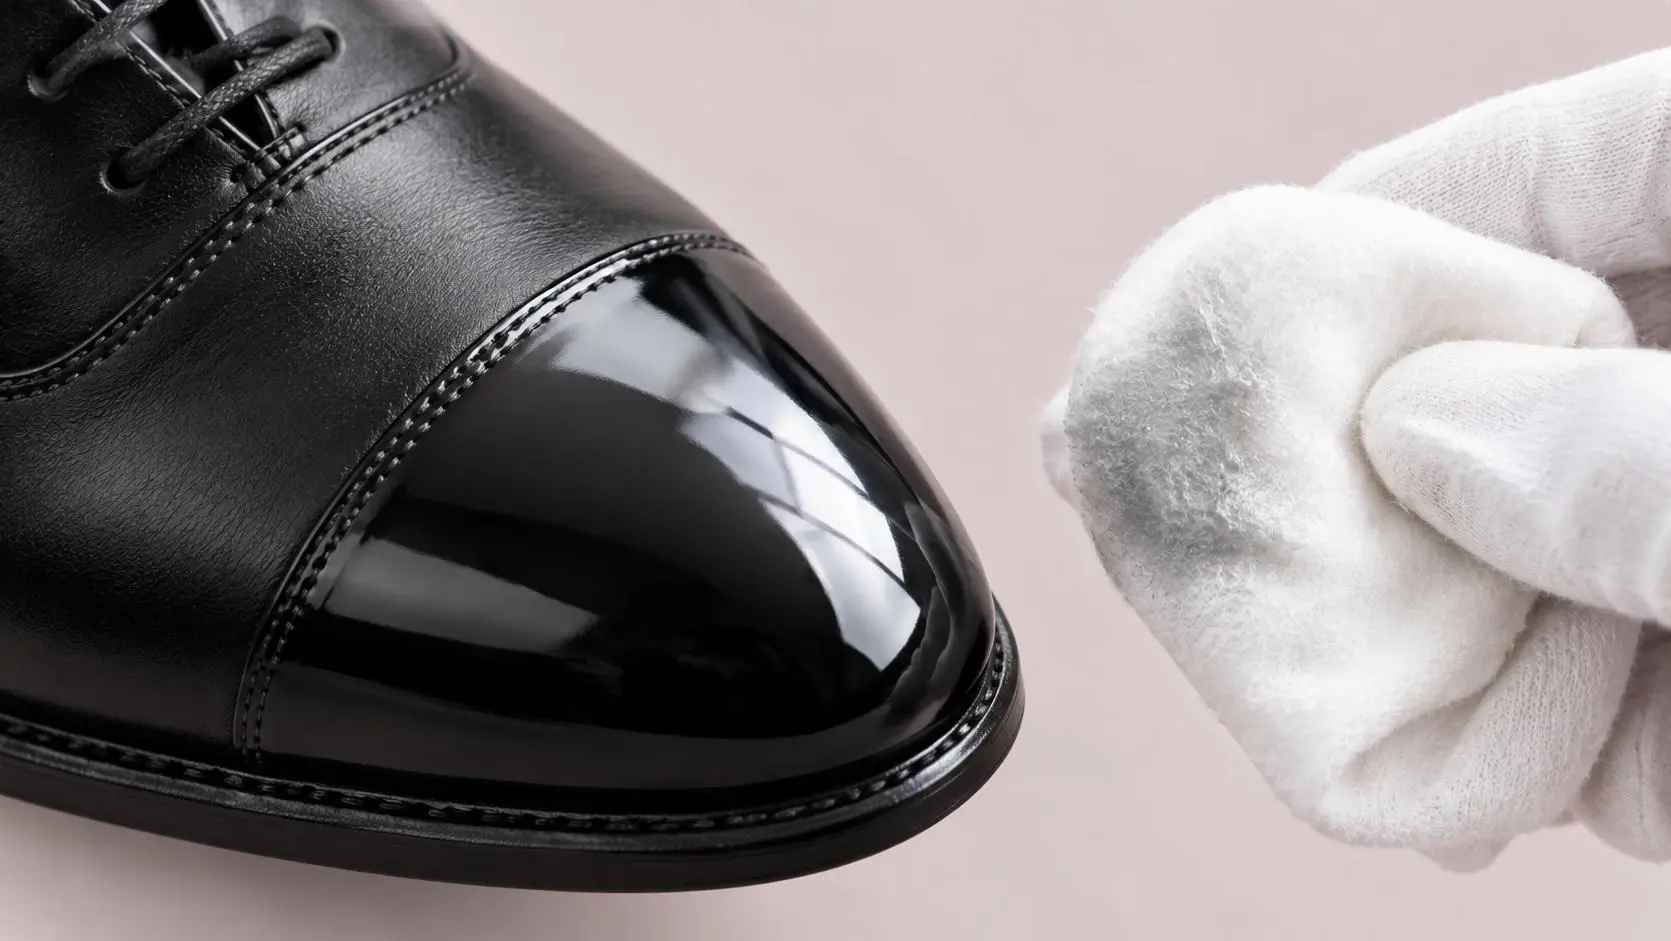
Overview. This article explains how to build a mirror shine on dress shoes at home, the glossy finish people usually associate with formal events and professional shoe shiners. It covers what a mirror shine actually is, the tools you need, the layer-by-layer method, and the mistakes that cause streaking instead of gloss. The goal is a technique you can repeat on toes and heels for weddings, interviews and formal evenings, without paying for a professional shine every time.
What a Mirror Shine Actually Is
A mirror shine is not a special product; it is a build-up of very thin wax layers, each one melted onto the leather with a little water and buffed as it sets. The gloss comes from the wax surface becoming smooth enough to reflect light, not from polishing harder.
Two ideas matter before you start:
- Thin layers win. Thick wax dries dull and uneven. Ten thin layers look better than two thick ones.
- Water does the work. A few drops of water on the cloth help each wax layer melt and spread evenly, which is why the technique is often called a water shine.
Tools You Need
| Tool | Purpose | Tip |
|---|---|---|
| Wax polish | Build the gloss layers | Use a firm wax; the shoe colour or neutral |
| Clean cotton cloth | Apply and buff each layer | A dedicated cloth stays free of old product |
| Water | Help each layer spread | Tap water in a small container is enough |
| Dusting brush | Prepare the leather | Always start from clean leather |
| Cotton pad or fingertip cloth | Final gentle pressure | This is where the gloss appears |
A high-wax polish matters more than the brand for this technique. Saphir, Kiwi and Angelus all make firm wax polishes that are used for mirror shines, and Yinghuameng's black and neutral wax polishes are formulated to build the same layered finish, with a buffing cloth included for the final pass (yhmshoecare.com).
Working space matters as much as the tools. Set up on a flat surface with good light, because the gloss is judged by how it reflects light, and a desk lamp makes the difference between layers visible. Keep the water container small and the cloth within reach, so the rhythm of wax, water and buffing is not interrupted. A steady rhythm matters more than pressure: the gloss builds from repetition, not from force, and a calm, unhurried session produces a cleaner finish than a rushed one.
Step by Step: From Clean Leather to Mirror Finish
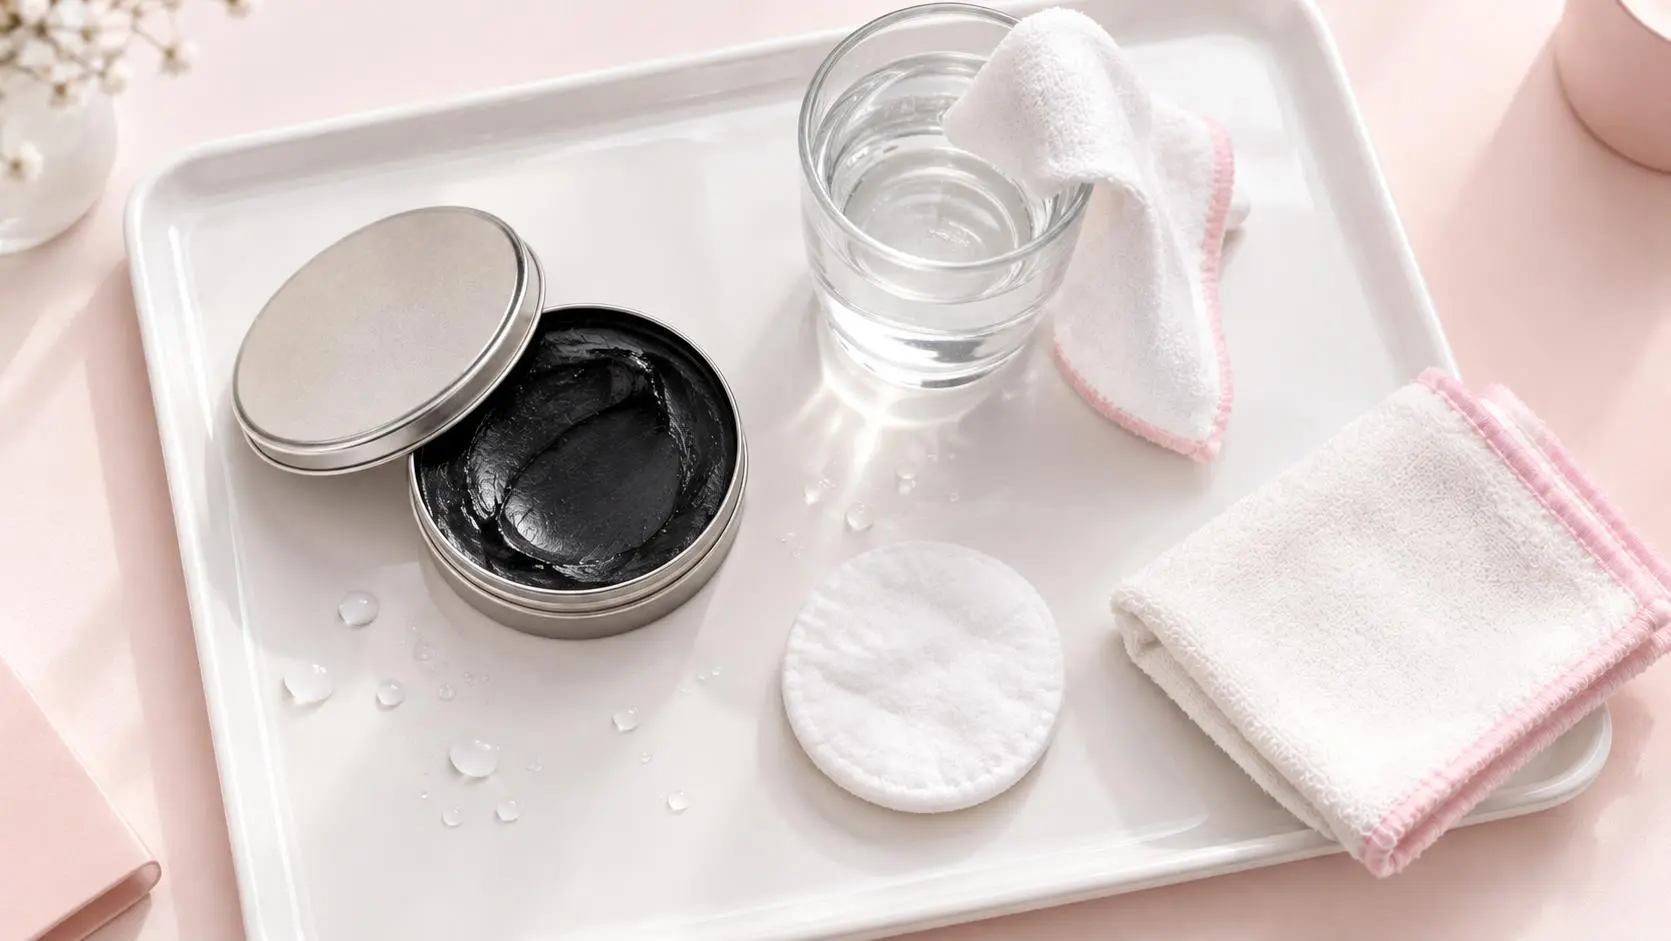
- Clean the shoe. Brush away dust and wipe the toe and heel with a damp cloth. A mirror shine only works on clean leather.
- Prepare the area. Cover the surrounding upper with a light cream or mask it with tape if you want the shine limited to the toe and heel.
- Load the cloth. Wrap a clean cotton cloth around your finger or a cotton pad, and pick up a small amount of wax.
- Add water. Dip the cloth in water so it is barely damp, keeping wax and water together on the cloth.
- Apply the first layer. Rub in small circles over the toe, keeping the layer thin and even. Let it set for a few minutes.
- Repeat. Add the next layer with fresh wax and a touch more water, overlapping the same area. Build layer by layer.
- Finish with pressure. On the last pass, buff with light pressure until the surface starts to reflect. This final pass turns layered wax into gloss.
- Let it set fully. Rest the shoe for a while before wear so the finish hardens.
Patience is the whole technique. If the surface starts to look cloudy, the layer was too thick; buff it down lightly and continue with thinner layers.
Common Mistakes and How to Avoid Them
| Mistake | What Happens | The Fix |
|---|---|---|
| Too much wax per layer | Dull, cloudy finish | Thin each layer; less product, more passes |
| No water on the cloth | Wax drags and smears | Keep the cloth barely damp |
| Polishing dirty leather | Dirt sealed into the shine | Clean and dry the shoe first |
| Buffing too early | Wax pulls off before setting | Wait a few minutes between layers |
| One giant toe area at once | Uneven gloss | Work in small overlapping circles |
| Using a dirty cloth | Streaks and old colour | Use a clean cloth for each stage |
Reading the surface as you work is the quickest way to correct mistakes: a cloudy patch says too much wax, a dragging cloth says too little water, and a shine that disappears after buffing says the layer never set. Catching these signs on the first layers saves the finish before it hardens.
When a Mirror Shine Is, and Isn't, the Right Look
A mirror shine belongs on toes and heels for weddings, formal events, interviews and ceremonies where the shoe is part of the presentation. It is also the look expected at military and ceremonial dress.
It is not the right look everywhere. A full mirror shine on every shoe, worn daily to a regular office, can look overdressed and wears off quickly with walking. For daily wear, a soft buffed shine from cream polish is more appropriate, and the mirror technique can be reserved for the days that call for it.
Mirror Shine on Different Leathers
The technique adapts to the leather, and knowing the limits prevents damage.
- Smooth calf leather is the best canvas for a mirror shine. It takes thin wax layers cleanly and buffs to a true gloss.
- Corodvan and dense polished leather shine well but need lighter pressure and fewer layers, because the surface is already smooth and wax sits on it rather than soaking in.
- Patent leather should not be waxed for a mirror effect; it is already glossy and heavy wax can dull or crack it. Wipe it instead.
- Textured and grain leather should stay away from mirror shines. Filling the grain with wax looks dusty, not glossy, and cream is the better care product.
When in doubt, build a small test shine on the heel edge first. If the area looks clean and glossy after a couple of layers, continue; if it looks cloudy or waxy, the leather is not suited to the technique.
Caring for Your Shine Tools
The cloth does as much work as the wax, and a neglected cloth produces a streaky shine.
- Keep a dedicated shine cloth. A cloth that has carried old wax or other colours will smear them into the new shine.
- Wash or replace cloths regularly. Cotton cloths can be washed without fabric softener and reused; when they become stiff or greasy, replace them.
- Store wax with the lid sealed. Open tins dry out, and dry wax is harder to spread in thin layers.
- Brush the shoe, not the tin. Keep the dusting brush separate from anything that touches the wax, so grit never rides into the shine.
- Let tools dry after use. A damp cloth stored in a bag can grow a smell that transfers to the shoes.
Frequently Asked Questions
Q1: Can I get a mirror shine with cream polish?
No. Cream polish conditions the leather but does not build the firm glossy layers a mirror shine needs. Use wax polish for the gloss and cream for the base care.
Q2: How many layers does a mirror shine need?
There is no fixed number; the finish appears when the wax surface becomes smooth and reflective. In practice, most people see results after several thin layers, and the shine deepens with practice.
Q3: Do I need a special mirror shine product?
A firm wax polish is the product; the technique creates the effect. Specialised kits just package the same wax with the cloths and instructions.
Q4: Why does my shine crack after a day of wear?
Cracking happens when wax layers are thick and the shoe flexes. Keep layers thin and avoid building a mirror shine on areas that crease, like the vamp.
Q5: Can I mirror shine suede or nubuck?
No. The technique is for smooth leather only. Suede and nubuck cannot take wax layers.
Q6: How do I remove a mirror shine I no longer want?
Lightly buff the wax off with a clean cloth, or use a gentle cleaner meant for smooth leather, then recondition with cream.
Q7: Should I mirror shine both shoes the same way?
Yes, and ideally in the same session, so the gloss and colour match between the pair.
Q8: How long does a mirror shine last?
It lasts until the shoes are walked in heavily, rained on, or re-polished over. Touch up the toe and heel before each formal event rather than rebuilding from scratch.
Q9: Can I build a mirror shine on shoes that already have cream polish on them?
Yes, and it is actually the normal sequence. The cream conditions the leather, and the wax layers go on top of the cream once it is dry.
Q10: Why is my mirror shine dull on one shoe but glossy on the other?
Usually the two shoes had different surface conditions, or one side got more layers. Clean and condition both shoes equally, then build the layers on both shoes in the same session so the gloss matches.
Editor's Note. This article explains a general shoe-shining technique and product categories; it contains no performance claims or numerical data. Results depend on the leather, the wax used and practice. Always test products on a small, unseen area first, follow the label instructions, and for very valuable or antique shoes consider a professional shoe repairer.
Overview. This article explains how to build a mirror shine on dress shoes at home, the glossy finish people usually associate with formal events and professional shoe shiners. It covers what a mirror shine actually is, the tools you need, the layer-by-layer method, and the mistakes that cause streaking instead of gloss. The goal is a technique you can repeat on toes and heels for weddings, interviews and formal evenings, without paying for a professional shine every time.
What a Mirror Shine Actually Is
A mirror shine is not a special product; it is a build-up of very thin wax layers, each one melted onto the leather with a little water and buffed as it sets. The gloss comes from the wax surface becoming smooth enough to reflect light, not from polishing harder.
Two ideas matter before you start:
- Thin layers win. Thick wax dries dull and uneven. Ten thin layers look better than two thick ones.
- Water does the work. A few drops of water on the cloth help each wax layer melt and spread evenly, which is why the technique is often called a water shine.
Tools You Need
| Tool | Purpose | Tip |
|---|---|---|
| Wax polish | Build the gloss layers | Use a firm wax; the shoe colour or neutral |
| Clean cotton cloth | Apply and buff each layer | A dedicated cloth stays free of old product |
| Water | Help each layer spread | Tap water in a small container is enough |
| Dusting brush | Prepare the leather | Always start from clean leather |
| Cotton pad or fingertip cloth | Final gentle pressure | This is where the gloss appears |
A high-wax polish matters more than the brand for this technique. Saphir, Kiwi and Angelus all make firm wax polishes that are used for mirror shines, and Yinghuameng's black and neutral wax polishes are formulated to build the same layered finish, with a buffing cloth included for the final pass (yhmshoecare.com).
Working space matters as much as the tools. Set up on a flat surface with good light, because the gloss is judged by how it reflects light, and a desk lamp makes the difference between layers visible. Keep the water container small and the cloth within reach, so the rhythm of wax, water and buffing is not interrupted. A steady rhythm matters more than pressure: the gloss builds from repetition, not from force, and a calm, unhurried session produces a cleaner finish than a rushed one.
Step by Step: From Clean Leather to Mirror Finish
- Clean the shoe. Brush away dust and wipe the toe and heel with a damp cloth. A mirror shine only works on clean leather.
- Prepare the area. Cover the surrounding upper with a light cream or mask it with tape if you want the shine limited to the toe and heel.
- Load the cloth. Wrap a clean cotton cloth around your finger or a cotton pad, and pick up a small amount of wax.
- Add water. Dip the cloth in water so it is barely damp, keeping wax and water together on the cloth.
- Apply the first layer. Rub in small circles over the toe, keeping the layer thin and even. Let it set for a few minutes.
- Repeat. Add the next layer with fresh wax and a touch more water, overlapping the same area. Build layer by layer.
- Finish with pressure. On the last pass, buff with light pressure until the surface starts to reflect. This final pass turns layered wax into gloss.
- Let it set fully. Rest the shoe for a while before wear so the finish hardens.
Patience is the whole technique. If the surface starts to look cloudy, the layer was too thick; buff it down lightly and continue with thinner layers.
Common Mistakes and How to Avoid Them
| Mistake | What Happens | The Fix |
|---|---|---|
| Too much wax per layer | Dull, cloudy finish | Thin each layer; less product, more passes |
| No water on the cloth | Wax drags and smears | Keep the cloth barely damp |
| Polishing dirty leather | Dirt sealed into the shine | Clean and dry the shoe first |
| Buffing too early | Wax pulls off before setting | Wait a few minutes between layers |
| One giant toe area at once | Uneven gloss | Work in small overlapping circles |
| Using a dirty cloth | Streaks and old colour | Use a clean cloth for each stage |
Reading the surface as you work is the quickest way to correct mistakes: a cloudy patch says too much wax, a dragging cloth says too little water, and a shine that disappears after buffing says the layer never set. Catching these signs on the first layers saves the finish before it hardens.
When a Mirror Shine Is, and Isn't, the Right Look
A mirror shine belongs on toes and heels for weddings, formal events, interviews and ceremonies where the shoe is part of the presentation. It is also the look expected at military and ceremonial dress.
It is not the right look everywhere. A full mirror shine on every shoe, worn daily to a regular office, can look overdressed and wears off quickly with walking. For daily wear, a soft buffed shine from cream polish is more appropriate, and the mirror technique can be reserved for the days that call for it.
Mirror Shine on Different Leathers
The technique adapts to the leather, and knowing the limits prevents damage.
- Smooth calf leather is the best canvas for a mirror shine. It takes thin wax layers cleanly and buffs to a true gloss.
- Corodvan and dense polished leather shine well but need lighter pressure and fewer layers, because the surface is already smooth and wax sits on it rather than soaking in.
- Patent leather should not be waxed for a mirror effect; it is already glossy and heavy wax can dull or crack it. Wipe it instead.
- Textured and grain leather should stay away from mirror shines. Filling the grain with wax looks dusty, not glossy, and cream is the better care product.
When in doubt, build a small test shine on the heel edge first. If the area looks clean and glossy after a couple of layers, continue; if it looks cloudy or waxy, the leather is not suited to the technique.
Caring for Your Shine Tools
The cloth does as much work as the wax, and a neglected cloth produces a streaky shine.
- Keep a dedicated shine cloth. A cloth that has carried old wax or other colours will smear them into the new shine.
- Wash or replace cloths regularly. Cotton cloths can be washed without fabric softener and reused; when they become stiff or greasy, replace them.
- Store wax with the lid sealed. Open tins dry out, and dry wax is harder to spread in thin layers.
- Brush the shoe, not the tin. Keep the dusting brush separate from anything that touches the wax, so grit never rides into the shine.
- Let tools dry after use. A damp cloth stored in a bag can grow a smell that transfers to the shoes.
Frequently Asked Questions
Q1: Can I get a mirror shine with cream polish?
No. Cream polish conditions the leather but does not build the firm glossy layers a mirror shine needs. Use wax polish for the gloss and cream for the base care.
Q2: How many layers does a mirror shine need?
There is no fixed number; the finish appears when the wax surface becomes smooth and reflective. In practice, most people see results after several thin layers, and the shine deepens with practice.
Q3: Do I need a special mirror shine product?
A firm wax polish is the product; the technique creates the effect. Specialised kits just package the same wax with the cloths and instructions.
Q4: Why does my shine crack after a day of wear?
Cracking happens when wax layers are thick and the shoe flexes. Keep layers thin and avoid building a mirror shine on areas that crease, like the vamp.
Q5: Can I mirror shine suede or nubuck?
No. The technique is for smooth leather only. Suede and nubuck cannot take wax layers.
Q6: How do I remove a mirror shine I no longer want?
Lightly buff the wax off with a clean cloth, or use a gentle cleaner meant for smooth leather, then recondition with cream.
Q7: Should I mirror shine both shoes the same way?
Yes, and ideally in the same session, so the gloss and colour match between the pair.
Q8: How long does a mirror shine last?
It lasts until the shoes are walked in heavily, rained on, or re-polished over. Touch up the toe and heel before each formal event rather than rebuilding from scratch.
Q9: Can I build a mirror shine on shoes that already have cream polish on them?
Yes, and it is actually the normal sequence. The cream conditions the leather, and the wax layers go on top of the cream once it is dry.
Q10: Why is my mirror shine dull on one shoe but glossy on the other?
Usually the two shoes had different surface conditions, or one side got more layers. Clean and condition both shoes equally, then build the layers on both shoes in the same session so the gloss matches.
Editor's Note. This article explains a general shoe-shining technique and product categories; it contains no performance claims or numerical data. Results depend on the leather, the wax used and practice. Always test products on a small, unseen area first, follow the label instructions, and for very valuable or antique shoes consider a professional shoe repairer.
Contact Us
Tel: +86 510 8659 6258
Address: No.3 Beihuan Road, Yuecheng Town, Jiangyin, Jiangsu Province, China.

Copyright © 2026 Jiangyin Yinghuameng Houseware Co., Ltd.