
SEARCH WHAT YOU WANT
How to Polish Brown Leather Boots Without Darkening Them: A Colour-Safe Method
Time:2026-10-20
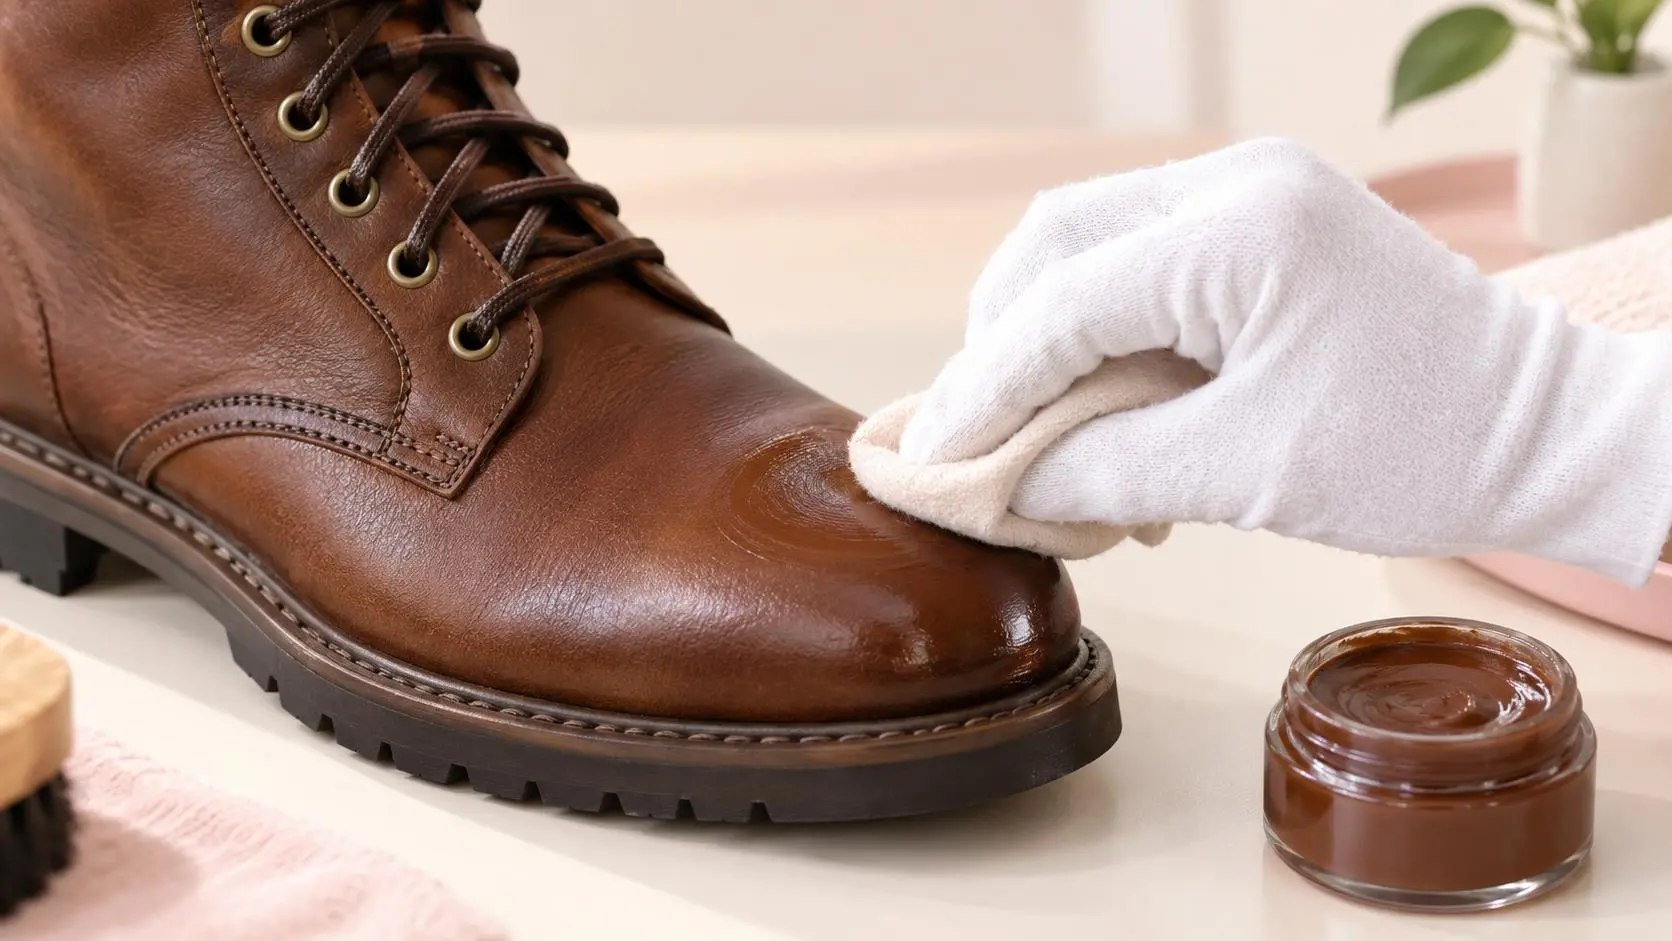
Overview. This article explains a colour-safe method for polishing brown leather boots, focused on the problem owners actually face: boots that slowly turn darker or blotchy after every polish. It walks through the four stages of a colour-safe routine, from cleaning the leather first to judging the result after buffing, and explains why thin layers and correct buffing matter more than the amount of product. Two tables summarise the routine and the common mistakes, and a numbered FAQ answers the follow-up questions. The closing note reminds you to test products on a hidden area before treating the whole boot.
Why Brown Boots Turn Dark
Darkening is rarely a single event; it is the accumulation of small habits. The main causes are:
- Thick layers of cream. Brown polish deepens as it builds, and thick layers darken the boot before they are even buffed.
- A shade darker than the boot. A tin that looks close in the shop can sit visibly darker once applied across a whole shaft.
- Polish left to sit too long. Cream left on the surface for a long time absorbs deeper and darkens unevenly.
- Re-polishing without cleaning. Old wax and dust mix with new polish into a muddy, darker film.
The good news is that all four causes are controllable. Colour-safe polishing is mostly about thin layers, correct timing and honest inspection.
Step 1: Clean Before You Polish
Polish cannot restore a dirty surface; it can only seal it. Before any colour product touches the boot:
- Brush off dust and grit with a soft horsehair brush, including the welt and the creases.
- Wipe the surface with a slightly damp cloth to remove dried mud and salt residue, then let the boot dry completely.
- For stubborn marks, use a dedicated leather cleaner on a small area before polishing.
Skipping this step is the most common reason a polish job looks dull: the product locks dust into the finish instead of feeding the leather.
Step 2: Apply in Thin, Matching Layers
The colour rule is simple: match the lightest visible area of the upper, and apply far less than you think you need.
| Application Habit | Colour-Safe Way | Risky Way |
|---|---|---|
| Amount per pass | A thin film on a soft cloth | A thick blob straight from the tin |
| Direction | Small circular motions, even coverage | Scrubbing one area repeatedly |
| Number of layers | One thin layer, judge, add if needed | Several layers at once |
| Shade choice | Matching or one shade lighter | A noticeably darker tin |
A thin layer applied with a soft cloth and small circular motions spreads evenly and lets you judge the tone before committing. If the boot needs more depth, add a second thin layer after the first has dried, rather than trying to fix it in one pass.
Step 3: Let It Dry, Then Buff
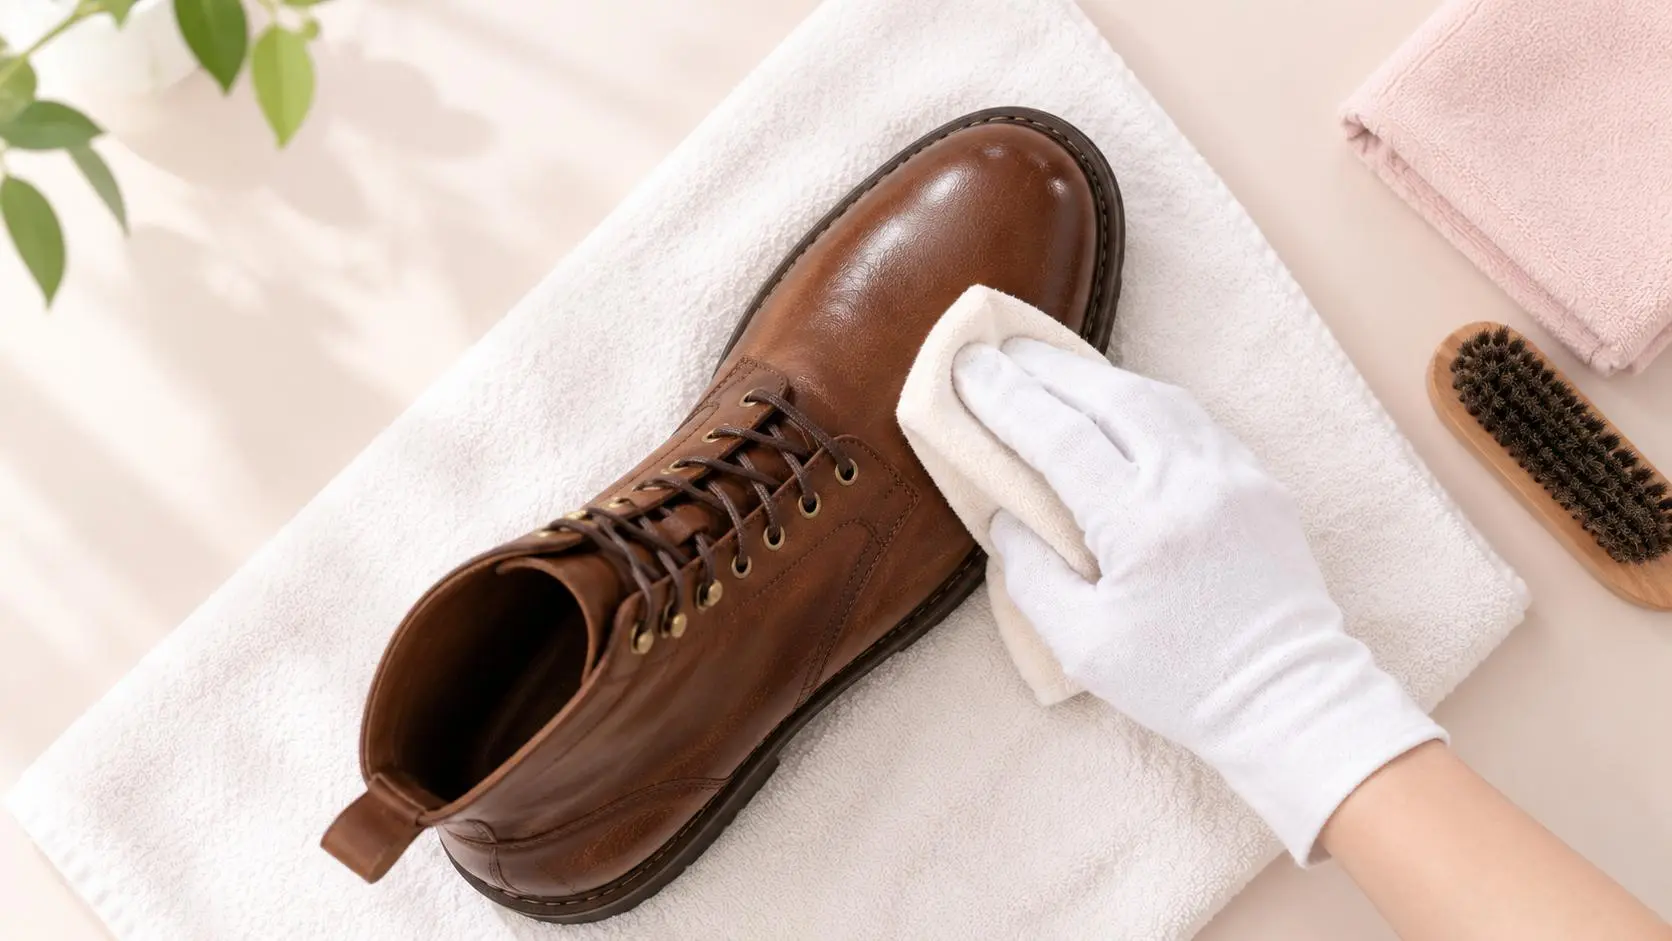
The drying step is where most darkening is created or avoided.
- Let the cream sit for a few minutes, not overnight, unless the product instructions say otherwise.
- Buff with a clean cloth or brush using firm, even strokes until the surface returns to a soft shine.
- Check the result in daylight, not under a lamp, because artificial light hides the darker patches.
If the boot looks darker than before, the fix is not more polish; it is a longer buff with a clean cloth, which removes excess product from the surface.
Step 4: Judge, Then Protect
Judge the whole boot after buffing, including the shaft and the heel, because the top of the boot is often forgotten until it fades unevenly. When the colour looks right, protect it:
- Add a light wax layer only on the toes and heels for scuff resistance.
- Use a waterproofing product suited to the leather for wet weather.
- Store the boots away from direct heat and sunlight, which darken and dry the leather over time.
Common Mistakes That Darken Brown Boots
| Mistake | Result | Colour-Safe Replacement |
|---|---|---|
| Polishing without cleaning | Muddy, darker film | Clean and dry first |
| Over-applying cream | Greasy dark patches | Thin layers, buff fully |
| Using the wrong shade | Boot looks dirty | Match the lightest visible area |
| Letting cream sit too long | Uneven absorption | Dry briefly, then buff |
| Waxing the whole boot | Cloudy build-up | Wax only toes and heels |
For a colour-safe start, Yinghuameng offers brown cream and wax polishes in the common boot shades, with horsehair brushes and buffing cloths, so the thin-layer method is easy to follow from one kit (yhmshoecare.com).
Light and Tan Boots: The Hardest Case
Light tan and honey boots darken most easily, because any colour product sits visibly on a pale surface. For these boots, the colour-safe rules become stricter:
- Match against the lightest part of the upper, never the darker creases.
- Prefer neutral products for routine conditioning, and use a matching light-brown cream only when the colour actually fades.
- Apply even thinner layers than on dark brown boots, and buff between layers.
- Accept that some darkening of the creases is natural wear; trying to polish it away adds product and darkens further.
A tan boot that looks slightly darker in the creases is normal, and healthy. A tan boot that looks uniformly darker after every polish is a sign that the routine, not the boot, needs to change. The same eye applies to medium and dark brown boots, just with a little more tolerance for depth.
Products That Help Protect the Colour
Some products make the colour-safe method easier:
| Product Type | Role in Colour Care |
|---|---|
| Neutral cream | Nourish and shine without colour change |
| Matching brown cream | Restore faded colour in thin layers |
| Light wax | Protect toes and heels without heavy tint |
| Leather cleaner | Remove old build-up before re-polishing |
| Waterproofing spray | Reduce water marks that darken patches |
None of these replaces the others. The cleaner removes the build-up, the cream restores moisture and colour, the wax protects the high-wear areas, and the waterproofing stops the water marks that darken brown leather unevenly. Used together, they keep the original tone far longer than polish alone.
What to Do When the Darkening Has Already Happened
If the boots are already darker than they should be, the fix is a short reset rather than more polish:
- Buff hard with a clean cloth. Excess product sits on the surface, and a thorough buff removes the visible layer without chemicals.
- Clean the leather. A dedicated leather cleaner lifts old wax and dirt evenly from the whole boot.
- Let the boot dry fully, away from heat, before any product returns to the surface.
- Re-polish with a lighter shade, in thin layers, and judge in daylight before adding a second layer.
The reset is gentler than it sounds because it removes build-up rather than stripping the leather. Most boots respond to a single clean-and-repolish cycle, and the colour that returns is the boot's own tone rather than the accumulated layers. After the reset, the colour-safe habits take over: thin layers, full buffing and matching shades, so the boot stays at the tone you just returned it to.
Frequently Asked Questions
Q1: Why do my brown boots get darker every time I polish them?
Layers of cream and wax accumulate and deepen the tone. Thin layers, full buffing and matching shades keep the original colour.
Q2: How do I lighten boots that have become too dark?
Buff thoroughly with a clean cloth first. If the darkening remains, clean the leather with a dedicated leather cleaner and re-polish with a lighter shade.
Q3: Should I use neutral polish on brown boots to avoid darkening?
Neutral polish preserves the existing tone and is the safest choice, but it will not restore colour to faded areas; use a matching brown cream for that.
Q4: How long should I leave polish on before buffing?
Follow the product instructions, usually a few minutes. Leaving cream for a long time causes deeper, darker absorption.
Q5: Can I fix dark patches with more polishing?
No. More product makes the patch worse. Buff, clean the area, and reapply a thin layer.
Q6: Is it better to use a brush or a cloth to apply polish?
A soft cloth spreads a thinner, more even layer, which is better for controlling colour. A brush is better for removing dust and for final buffing.
Q7: Does waterproofing darken brown leather?
Some waterproofing products darken leather slightly. Test on a hidden area and choose a product suited to brown leather if the tone matters to you.
Q8: Why are my boots patchy after polishing?
Patchiness usually comes from uneven application or polishing over dirt. Even thin layers and a clean surface prevent it.
Q9: Should I polish the shaft of the boot?
Yes, including the shaft and heel, so the whole boot fades and shines evenly. These areas are easy to forget.
Q10: How often can I colour-polish without darkening?
As often as the leather needs it, but always with thin layers and full buffing. Neutral conditioning between colour sessions reduces the total number of colour layers.
Editor's Note. This article describes general leather care practice and product categories; it contains no performance claims or numerical data. Results depend on the leather, the products you choose and how the boots are worn. Always follow the instructions on the products you buy, test new products on a small, unseen area first, and consult a professional shoe repairer for valuable or delicate footwear.
Overview. This article explains a colour-safe method for polishing brown leather boots, focused on the problem owners actually face: boots that slowly turn darker or blotchy after every polish. It walks through the four stages of a colour-safe routine, from cleaning the leather first to judging the result after buffing, and explains why thin layers and correct buffing matter more than the amount of product. Two tables summarise the routine and the common mistakes, and a numbered FAQ answers the follow-up questions. The closing note reminds you to test products on a hidden area before treating the whole boot.
Why Brown Boots Turn Dark
Darkening is rarely a single event; it is the accumulation of small habits. The main causes are:
- Thick layers of cream. Brown polish deepens as it builds, and thick layers darken the boot before they are even buffed.
- A shade darker than the boot. A tin that looks close in the shop can sit visibly darker once applied across a whole shaft.
- Polish left to sit too long. Cream left on the surface for a long time absorbs deeper and darkens unevenly.
- Re-polishing without cleaning. Old wax and dust mix with new polish into a muddy, darker film.
The good news is that all four causes are controllable. Colour-safe polishing is mostly about thin layers, correct timing and honest inspection.
Step 1: Clean Before You Polish
Polish cannot restore a dirty surface; it can only seal it. Before any colour product touches the boot:
- Brush off dust and grit with a soft horsehair brush, including the welt and the creases.
- Wipe the surface with a slightly damp cloth to remove dried mud and salt residue, then let the boot dry completely.
- For stubborn marks, use a dedicated leather cleaner on a small area before polishing.
Skipping this step is the most common reason a polish job looks dull: the product locks dust into the finish instead of feeding the leather.
Step 2: Apply in Thin, Matching Layers
The colour rule is simple: match the lightest visible area of the upper, and apply far less than you think you need.
| Application Habit | Colour-Safe Way | Risky Way |
|---|---|---|
| Amount per pass | A thin film on a soft cloth | A thick blob straight from the tin |
| Direction | Small circular motions, even coverage | Scrubbing one area repeatedly |
| Number of layers | One thin layer, judge, add if needed | Several layers at once |
| Shade choice | Matching or one shade lighter | A noticeably darker tin |
A thin layer applied with a soft cloth and small circular motions spreads evenly and lets you judge the tone before committing. If the boot needs more depth, add a second thin layer after the first has dried, rather than trying to fix it in one pass.
Step 3: Let It Dry, Then Buff
The drying step is where most darkening is created or avoided.
- Let the cream sit for a few minutes, not overnight, unless the product instructions say otherwise.
- Buff with a clean cloth or brush using firm, even strokes until the surface returns to a soft shine.
- Check the result in daylight, not under a lamp, because artificial light hides the darker patches.
If the boot looks darker than before, the fix is not more polish; it is a longer buff with a clean cloth, which removes excess product from the surface.
Step 4: Judge, Then Protect
Judge the whole boot after buffing, including the shaft and the heel, because the top of the boot is often forgotten until it fades unevenly. When the colour looks right, protect it:
- Add a light wax layer only on the toes and heels for scuff resistance.
- Use a waterproofing product suited to the leather for wet weather.
- Store the boots away from direct heat and sunlight, which darken and dry the leather over time.
Common Mistakes That Darken Brown Boots
| Mistake | Result | Colour-Safe Replacement |
|---|---|---|
| Polishing without cleaning | Muddy, darker film | Clean and dry first |
| Over-applying cream | Greasy dark patches | Thin layers, buff fully |
| Using the wrong shade | Boot looks dirty | Match the lightest visible area |
| Letting cream sit too long | Uneven absorption | Dry briefly, then buff |
| Waxing the whole boot | Cloudy build-up | Wax only toes and heels |
For a colour-safe start, Yinghuameng offers brown cream and wax polishes in the common boot shades, with horsehair brushes and buffing cloths, so the thin-layer method is easy to follow from one kit (yhmshoecare.com).
Light and Tan Boots: The Hardest Case
Light tan and honey boots darken most easily, because any colour product sits visibly on a pale surface. For these boots, the colour-safe rules become stricter:
- Match against the lightest part of the upper, never the darker creases.
- Prefer neutral products for routine conditioning, and use a matching light-brown cream only when the colour actually fades.
- Apply even thinner layers than on dark brown boots, and buff between layers.
- Accept that some darkening of the creases is natural wear; trying to polish it away adds product and darkens further.
A tan boot that looks slightly darker in the creases is normal, and healthy. A tan boot that looks uniformly darker after every polish is a sign that the routine, not the boot, needs to change. The same eye applies to medium and dark brown boots, just with a little more tolerance for depth.
Products That Help Protect the Colour
Some products make the colour-safe method easier:
| Product Type | Role in Colour Care |
|---|---|
| Neutral cream | Nourish and shine without colour change |
| Matching brown cream | Restore faded colour in thin layers |
| Light wax | Protect toes and heels without heavy tint |
| Leather cleaner | Remove old build-up before re-polishing |
| Waterproofing spray | Reduce water marks that darken patches |
None of these replaces the others. The cleaner removes the build-up, the cream restores moisture and colour, the wax protects the high-wear areas, and the waterproofing stops the water marks that darken brown leather unevenly. Used together, they keep the original tone far longer than polish alone.
What to Do When the Darkening Has Already Happened
If the boots are already darker than they should be, the fix is a short reset rather than more polish:
- Buff hard with a clean cloth. Excess product sits on the surface, and a thorough buff removes the visible layer without chemicals.
- Clean the leather. A dedicated leather cleaner lifts old wax and dirt evenly from the whole boot.
- Let the boot dry fully, away from heat, before any product returns to the surface.
- Re-polish with a lighter shade, in thin layers, and judge in daylight before adding a second layer.
The reset is gentler than it sounds because it removes build-up rather than stripping the leather. Most boots respond to a single clean-and-repolish cycle, and the colour that returns is the boot's own tone rather than the accumulated layers. After the reset, the colour-safe habits take over: thin layers, full buffing and matching shades, so the boot stays at the tone you just returned it to.
Frequently Asked Questions
Q1: Why do my brown boots get darker every time I polish them?
Layers of cream and wax accumulate and deepen the tone. Thin layers, full buffing and matching shades keep the original colour.
Q2: How do I lighten boots that have become too dark?
Buff thoroughly with a clean cloth first. If the darkening remains, clean the leather with a dedicated leather cleaner and re-polish with a lighter shade.
Q3: Should I use neutral polish on brown boots to avoid darkening?
Neutral polish preserves the existing tone and is the safest choice, but it will not restore colour to faded areas; use a matching brown cream for that.
Q4: How long should I leave polish on before buffing?
Follow the product instructions, usually a few minutes. Leaving cream for a long time causes deeper, darker absorption.
Q5: Can I fix dark patches with more polishing?
No. More product makes the patch worse. Buff, clean the area, and reapply a thin layer.
Q6: Is it better to use a brush or a cloth to apply polish?
A soft cloth spreads a thinner, more even layer, which is better for controlling colour. A brush is better for removing dust and for final buffing.
Q7: Does waterproofing darken brown leather?
Some waterproofing products darken leather slightly. Test on a hidden area and choose a product suited to brown leather if the tone matters to you.
Q8: Why are my boots patchy after polishing?
Patchiness usually comes from uneven application or polishing over dirt. Even thin layers and a clean surface prevent it.
Q9: Should I polish the shaft of the boot?
Yes, including the shaft and heel, so the whole boot fades and shines evenly. These areas are easy to forget.
Q10: How often can I colour-polish without darkening?
As often as the leather needs it, but always with thin layers and full buffing. Neutral conditioning between colour sessions reduces the total number of colour layers.
Editor's Note. This article describes general leather care practice and product categories; it contains no performance claims or numerical data. Results depend on the leather, the products you choose and how the boots are worn. Always follow the instructions on the products you buy, test new products on a small, unseen area first, and consult a professional shoe repairer for valuable or delicate footwear.
Previous: No more data
Contact Us
Tel: +86 510 8659 6258
Address: No.3 Beihuan Road, Yuecheng Town, Jiangyin, Jiangsu Province, China.

Copyright © 2026 Jiangyin Yinghuameng Houseware Co., Ltd.